
This post describes the process of creating a master machine, making an “image” of that master, copying that image onto a USB bootable drive and the commands needed to clone the master onto target machines.
This process was devised by PCF’s Jan Deruiter with consulting input from Linux guru/expert Keith Perry from DAO Technologies.
One of the reasons we have posted these details is for users to be able to replicate the process for themselves. We have been contacted multiple times over the years to support programs overseas. However, since used computers with batteries cannot be shipped easily (or at all), we hope that users (you) will make a master computer in the language you want to distribute and then send users in the destination country the USB Installers so they can clone the machines there/locally. One of the best parts of using Linux is that old/slow computers unable to run Windows will run just fine using Linux.
Some terms we will use:
- Master computer – the machine you will be cloning; all machines you give away will be exactly like this one
- Imaging – the process of saving a binary file containing a bit-for-bit copy of your master. The image will be expanded and copied as part of the cloning or imaging process.
- USB Installer – a flash drive used to install Linux onto your master computer and USB Imaging flash drive/s
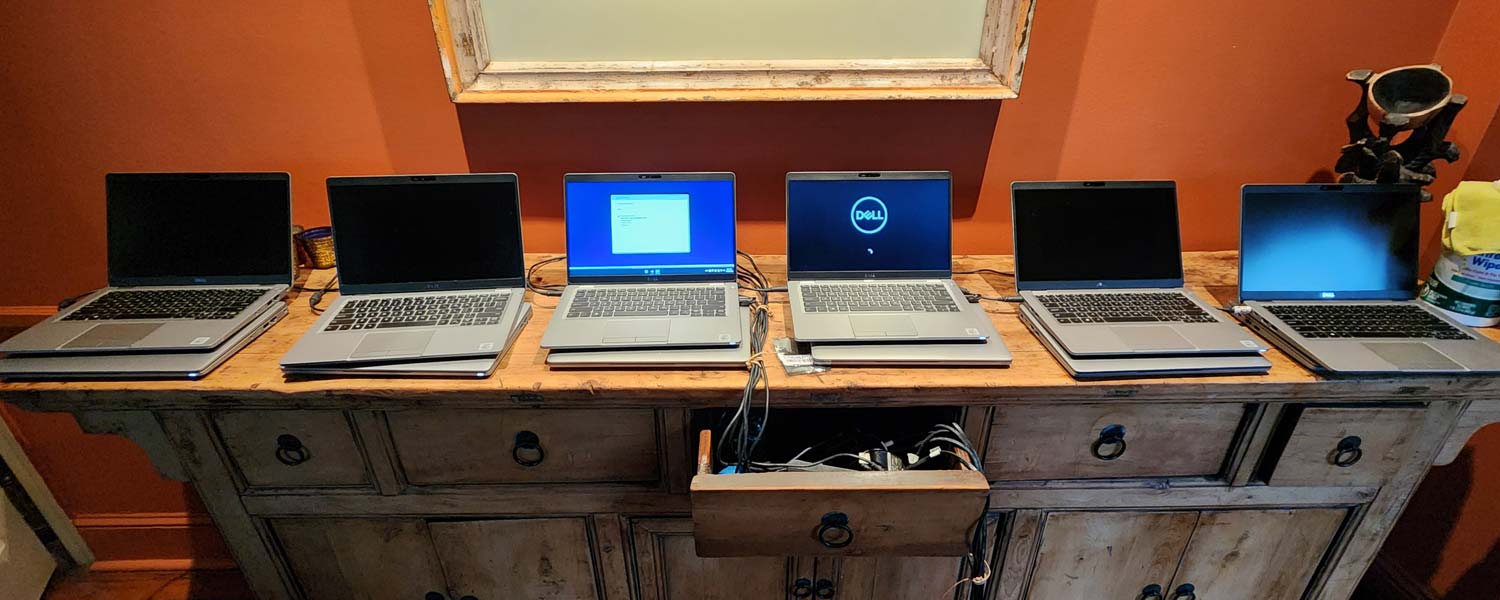
- USB Imaging Flash drive/s – a USB flash drive that you can boot from and which contains the “image” of your Master in order to clone it onto other machines. At PCF, we use dozens of these (64Gb each).
- USB Dev drive – optional – at PCF, we used an XXL flash drive that holds more than one image. We typically use 128Gb or 256Gb flash drives and use a handful for backups.
- Imaging Computer – the laptop or desktop computer that we use to house all the image versions and which we use to make the USB installers.
Imaging versus Clean Installs
When PCF gives away computers, we hand out cloned copies of a master machine we set up (created.) This Master has all the accounts created already, settings configured, software added, and so on. This means recipients can simply turn on the machine and start using it. Frankly, we love Linux but sometimes adding software or changing settings can take a bit of getting used to and as a result, we prefer to do that work for users beforehand rather than deal with the support of helping people do so on their own.
That said, you may wish to just set up a machine with a fresh copy of a Linux operating system and then give it to the recipient to configure themselves. If that is your intention, you just need to create a bootable Linux (e.g Xubuntu) flash drive and install it onto the machine you are giving away.
Imaging Process
In a nutshell, you will create a master machine and then make an “image” of that machine (a bit-for-bit copy contained in a binary file). That image is then copied onto a bootable USB flash drive that is used to clone your master onto the machines you are preparing. So rather than users having to set up each machine from scratch, you are creating a master computer and then cloning or copying that machine onto other computers.
Create a Linux OS Flash Drive
To create a master machine you need to get the operating system on there. While you may be able to buy installer Flash drives, it is fairly easy to create your own Flash drive.
- Download the Xubuntu ISO (file) and then use a utility to make a bootable USB drive.
- Do a web search as the process is slightly different for Mac and Windows users.
- You will need this bootable Xubuntu Flash drive to put the OS onto your “Master computer” (the machine you are setting up and will be cloning onto other machines).
- You will also need this bootable Xubuntu Flash drive again later to make a bootable USB Installer Flash drive/s (the USB Flash drive that includes the “image” of your master computer and which you will use to clone the master onto other machines).
Master Machine Creation
PCF has been using the Xubuntu operating system for thousands of computers we have donated over the years. While there are hundreds of flavors of Linux, early on we determined Xubuntu to be the best combination of usability (ease of use), features, and weight (runs on computers with little RAM).
Pick a low memory, slow processor, small hard drive, older machine as your master. You are basically using the lowest common denominator machine to ensure it works. Keep this master as your dedicated “master”; you’ll update it and/or add Apps to it in the future and then make new “images” (bit for bit binary copy) to clone it to machines. As arduous as the imaging process is, it is often faster than updating machines imaged using a dated “master”. In other words, rather than use an old master and then updating the machines after you clone them, it is often faster to just make a new image of a newly updated master.
Once you have installed Xubuntu (or another flavor of Linux if you wish), set up three accounts on the machine:
- one account for the student user of the machine. We limit the privileges of that user so that a student user cannot ‘wreck’ the computer, create new users, etc. We use the name “Student” and password “student”; that is what the Philadelphia School District uses for lab computers. We use Auto Login for this user, meaning it logs in without asking for a password. The password is then only needed when the machine goes to sleep.
- another account for the parent/adult or teacher. This Linux user will be an Admin to allow them to create new users and update the machine, etc.
- Finally, we create a PCF Admin account just in case users changed their default password and are locked out. We provide users with the password in case they are unable to gain access to their account.
We then add software to the machine that we feel will be useful (we try to use the “Software” interface as much as possible to simplify future updates):
- Zoom (for remote learning)
- LibreOffice (basically a free open-source suite of Apps that provide all the functionality of Microsoft Office: Word, Excel, PowerPoint, etc.
- Audacity (for music mixing/editing)
- Blender for graphics
- Utilities we use ourselves gParted, Disk, etc.
- We add a bunch of libraries and utilities (do a web search on ways to improve Xubuntu and use your judgment).
- Add Chrome and Firefox.
We then configure each user account:
- Customize the Launcher menu for each account.
- Set the browser privacy settings for the student account (delete cache and history upon quit, disable location, ask for camera, etc.)
- Add desktop item for Chrome (it is what SDP students are used to)
- Create bookmarks on the toolbar for SDP login, PhillyKids.org, etc.
- Add custom Desktop images (wallpapers); we use a Student PNG that actually lists the default password (“Student”)
- For the Student user, if you configured it for Auto Login (above), there is an issue that needs to be checked/fixed: when you launch Chrome, you may get a keyring login error message. To fix:
- log in as Student,
- terminal: rm ~/.local/share/keyrings/login.keyring
Configure Updating and Update the machine:
- Make sure you are logged in as a user that is allowed to make changes (not the Student account typically)
- Go the the Launcher menu > Settings > “Software & Updates” and configure your updates. We tend to turn off the upgrades and do as little updating as possible. This should hold you over for a couple of years.
- Then go to the launcher menu > Setting > “Software Updater” and run the updates. Often you need to select this multiple times.
- Once you are done, go to the Launcher menu and open “Software” and run the updates there (right-most tab)
- If you want to be safe, open Terminal and run “sudo apt update”
Final Prep:
- Remember that when you clone this machine, it will be EXACTLY like this master machine. Therefore, empty your trashes (each account), delete browsing histories, delete caches, etc.
- We create an empty directory inside the public folder that lists the revision of this master. That way when we run into one of our machines in the future, we can check to see roughly how old it is and what OS was on there when we deployed it.
- We suggest letting your Master sit overnight and log into your accounts again the next day and make final edits.
- Once you are done, shut down the Master machine.
Creating a USB ‘Dev’ Flash Drive
To create an image you need to start from another device. We use a Flash drive for this.
- Pick a Flash drive that is big enough to hold your OS and the image of the master machine. We suggest 64Gb minimum but actually use 128Gb or 256Gb Flash drives to create the image of the master.
- We have also found over the years that there are big differences between Flash drives in terms of compatibility. We basically tried many different ones and stick with the ones that work best. When you see the specs, go for the ones that list the most versions of USB with an emphasis on the older protocols.
- Put Xubuntu OS onto that drive as if it is a hard drive. To do so, you may need to boot from a Linux machine and then insert both the installer USB and the Flash Dev drive you will be using. Use the same Xubuntu installer (Flash drive) you used to create your master to install the OS onto this other (xxl) USB Flash Dev drive.
- On the USB Dev drive (the large one you will use for the imaging), create an Admin account for yourself (pick a short name and an easy, short, lower-case password!). If it won’t let you pick a short password for the Admin account, we have tricked it by creating two accounts: you set up a restricted (non Admin) admin account with the simpler password and then upgrade that account to be an Admin later, leaving intact the existing weaker password.
- Add the gParted app (use Settings > Software). Also add the Disks app if it is not on there already.
- We use a custom Desktop picture (wallpaper) for all accounts and types of drives so that we are always sure when we have booted from our Dev drive (differentiate from your Master machine accounts).
Boot from your USB Drive
This is sometimes trivial, sometimes hard, and on occasion impossible. Easily the most frustrating step in making your master computer and any time you need to image/clone a machine. The process needs to be done once on your master and then once any time you are cloning a new machine.
If you’re feeling lucky:
- make sure your USB drive is inserted into the Master machine you are cloning and start up your machine. As soon as it boots, press the key for startup options on your keyboard. On Dell and Lenovo it is usually F12. HP’s usually F9, etc. Do a web search to find out the key for startup options on your make/model computer.
- In the startup options, check to see if the USB drive appears and then boot from that.
- Once you have booted, make sure you have booted from your Dev USB stick.
For the rest of us 🙂 :
It is unusual for you to be able to just boot a formerly Windows machine using a Linux USB drive. If your USB drive did not show up as a boot option above, then follow these steps.
- insert your USB device and boot the machine. Enter the BIOS setup menu using whatever key you need for your machine. Dell and Lenovo are usually F2, HP is F10, Asus …
- once you are in BIOS settings here are some things to look for:
- turn off secure boot (sometime this works fine but not needed).
- turn off UEFI Boot Path Security
- make sure SATA is not in mirroring/RAID mode. Set to AHCI.
- turn off Windows boot manager (or anything else that appears overtly Windows dependent)
- make sure USB ports are enabled
- under startup devices, make sure USB is enabled
- make sure legacy mode is enabled as well as UEFI (which is what we’ll use). If you can only use one, make sure UEFI is enabled.
- make sure system is not locked with Admin passwords (desktops can be reset if they are locked, laptops usually not).
- sometimes there is a difference between USB ports on the machine: try the front if the back ones don’t work. Or switch between USB 2 and 3 (the blue ones) if one or the other does not work.
- sometimes the Flash drives you are trying to boot from are incompatible. When you buy them, do not skimp on price and look to see how many standards are supported.
- Once you have set all the BIOS options, save and exit and then press whatever key you need to get back to the startup/boot menu.
- If your USB still does not appear, go back to BIOS and keep digging for options that you think might prevent a Windows machine from booting from the USB system.
Resize the Master Machine Partition
Since you are cloning by using a bit-for-bit copy, it is important that you make the master machine’s partition as small as possible. There is no use copying empty space from one machine to another! Making the partition smaller will reduce the space it takes up on your (expensive) USB drives and makes the process faster as it won’t have to copy as much. Finally, it eliminates the problem if the target drive is smaller than your master drive.
The process is that you make the master machine’s drive only 1 or 2 GB larger than what is used (“available space” <= 2Gb). Then after you image a machine, you expand the partition of the cloned computer to use up however much space that drive has (again using gParted).
- Make sure you are booted from your USB drive as you cannot change the partition size of an active partition (one that you booted from).
- Launch gParted app (install it using the Launcher menu > Software > gParted)
- Enter your Admin password and then use gParted to make the partition of the master machine’s main (not boot) partition smaller. We reduce the size to leave only 2Gb or less of unused space.
- Make sure you have the right drive selected (use the dropdown menu on the top right to select the master computer’s drive).
- Depending on how many Apps you installed, the size will be between 35Gb and 45Gb (including the 2gb of available space on the main data partition).
- After resizing, save your changes in gParted and quit.
Create an Image of the Master Machine
To clone your machine to others means we have to make an “image” of the machine. This is a bit-for-bit copy of the boot and data partitions that is then saved as a single binary file that can then be unpacked and copied onto target machines to clone your original/master. It is a great process that reduces the time to clone a machine to 5-10 minutes once you are able to start up from your USB.
Assuming you have made the Master machine’s main partition smaller, it is time to make the image:
- make sure you have enough empty space on your USB Dev Flash drive. At least 45Gb depending on how small you were able to make your master’s main partition.
- start up from your USB Dev flash drive
- start up Terminal app and enter root user mode using the command “sudo su” (enter password)
- find out what the name of your drives and partitions: “lsblk”
- unmount the Master’s drive if it was mounted (mount point will show /media/etc in lsblk) Right click in desktop to unmount.
So conceptually, this is what we are doing next. And we have Keith Perry to thank for figuring out this crucial step:
Because the sizes of the machines you will be cloning in the future will all be different from your master, we cannot just use a straight image. When PCs switched to UEFI (from the much simpler BIOS) a few years ago, we have to add some steps to make it work. In essence, UEFI is smarter and keeps track of the partition sizes in the boot records. But by using a sparse image and setting it to zero, it will throw an error when you clone the machine which is then easily fixed. With the click of a button after we clone the machine, the boot records will be updated and everything will work fine.
Follow the steps below carefully. Remember Linux is case sensitive. Every character matters:
- Open Terminal app
- sudo su — to enter root user and enter password
- mkdir /install — only need to do this once: create an “install” directory on your Flash drive that you will use to house your image/s
- lsblk
- note the master machines drive’s id. Typically either /dev/sda (physical hard drives) or /dev/nvme0n1 (that’s a zero before the n1!) for solid state drives
- note: it is possible for the internal drive to come up as /dev/sdb or even sdc!
- fdisk -l /dev/sda or fdisk -l /dev/nvme0n1 — note the COUNT: the large number listed as the END of the second partition.
- dd if=/dev/zero of=/install/pcf-v##.img bs=1 count=0 seek=35G — creates sparse file
- specify the size you want as the SEEK size. Listed as 35G above. This should be slightly larger than whatever you made your master’s main partition plus the boot partition.
- note: pick whatever name you want in lieu of “pcf-v##” but be sure to include the .img extension. Keep it short and lower case for ease of use later.
- losetup -f — finds next avail loop device
- losetup /dev/loop# /install/pcf-v##.img — tie the loop to the sparse file
- note: this assumes you created an “install” directory on the root of your USB drive (see beginning of these steps)
- replace loop # with the actual loop number from the previous step (e.g. “loop13”)
- replace pcf-v## with whatever you decided on for the image name in the previous step
- dd if=/dev/nvme0n1 of=/dev/loop# bs=512 count=#### — image into the loop/sparse
- “if” parameter is for input file; “of” is the output file; bs = block size; count = size
- depending on your master, dev/nvme0n1 may be /dev/sda or even /dev/sdb or…
- replace the count’s value of #### with the large COUNT number in step 1 (fdisk -l; command above)
After the second dd command, one of three things will typically happen:
- Your prompt returns after 10 minutes or so and everything is fine.
- You get an error message that indicates you ran out of room. Delete your loop drive (losetup -d /dev/loop#) and try again with larger sparse image size (increase the SEEK value in your first dd command).
- An error for some other reason. Check the error and make sure capitalization and destinations are correct.
Assuming it worked fine, you now need to fix the partition size and delete the loop drive:
- gdisk /dev/loop# — fix gpt header on the loop drive
- ‘w’ to fix/re-write gpt — write changes to disk/replace GPT
- Y (capital) and enter — to save your changes
- losetup -d /dev/loop# — (e.g. loop13) disconnect/delete the loop device
Housekeeping / Backups
We suggest copying the image file you just created to another machine. Unfortunately, we do this using the Terminal App rather than drag and drop since the file you created is owned by the root user. There may be ways to change that but this is what we’ve used for years.
Do your own web searches but to copy files you basically need these commands:
- mount – to mount a partition so you can copy files to it using Terminal. E.g. mount /dev/sda2 /mnt (where /mnt is the mount point you can then use)
- note: you want to mount the data partition and not the drive. In other words /dev/sda2 or /dev/nvme0n1p2 (but not /dev/sda, etc.)
- umount if you need to unmount something— e.g umount /dev/mnt
- note you cannot unmoutn a drive if you are ‘in it’. Change your ‘position’ to the root of the boot drive using “cd /” in order to then be able to unmount /mnt
- mv — to move/copy files. Eg mv /install/pcf-v37 /mnt/images/pcf-v37.img
- rm — to delete files
- sync — to sync directories after deleting files
- cd — to change directories; e.g. cd /mnt/install
- ls — to list directory contents
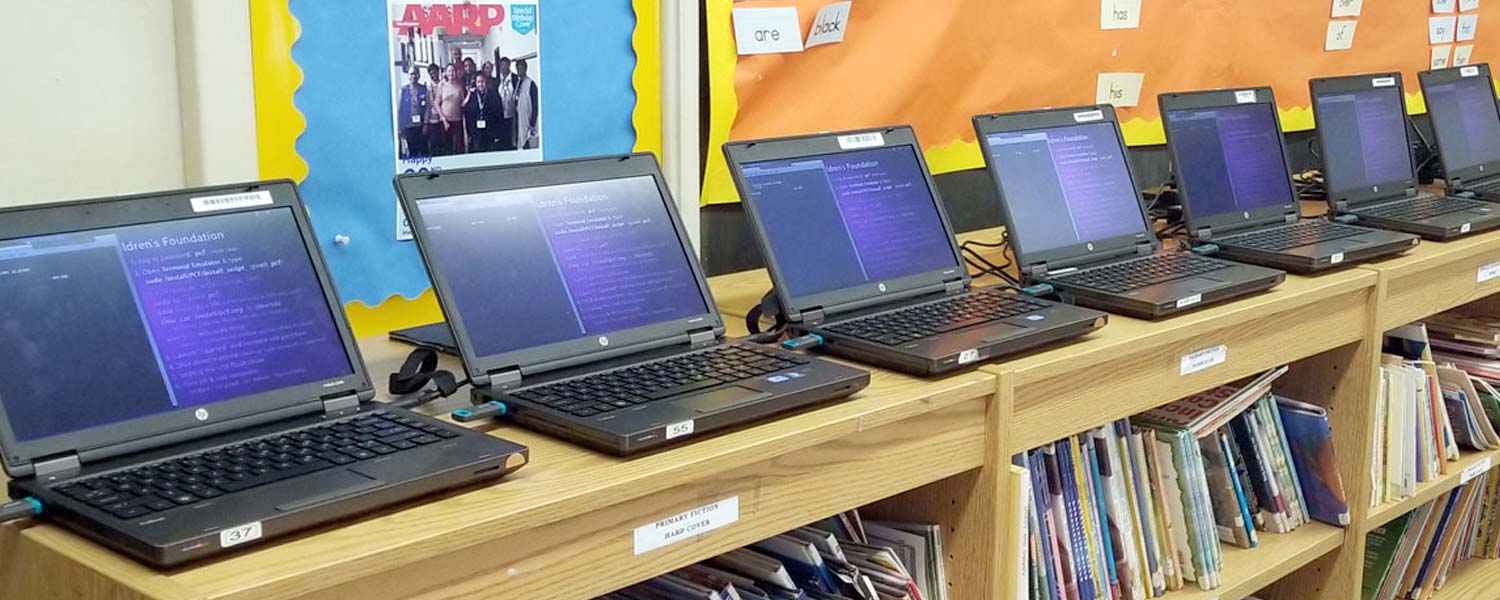
To Clone/Copy Your Master Machine onto Another Computer
Assuming you made an image of your master computer, you can now use that USB stick to clone your master onto other machines.
On the machine you want to wipe and clone, boot from the USB Installer (or Dev) drive. See above for booting instructions.
Once you are booted from your USB, launch the Terminal app:
- sudo su and enter password to enter root user
- lsblk to learn what drive you are copying to
- note that there are typically two drives listed. /dev/sda and/or /dev/sdb and/or /dev/nvme0n1
- the one with a single “/” after it (mount point) is the boot volume. Should be your USB drive and typically listed as /dev/sda if you have an internal solid state drive (nvme0n1) or /dev/sdb if your laptop or desktop has a regular hard drive (typically /dev/sda)
- the other one is of the machine you are cloning. If the partition is mounted, it will have a mount point of /media/etc.
- if the target machine is mounted, we usually right-click the icon in the Finder and choose unmount (not Eject!)
- time cat /install/pcf-v##.img > /dev/sda/
- or: time cat /install/pcf-v##.img > /dev/nvme0n1
- replace pcf-v## with whatever you named your image
- the above assumes you created an “install” directory at the root of your startup USB disk that houses your .img / image file
- the “>” character is critical. It indicates the direction for copying. If you fail to enter this, your screen will fill with thousands of characters until you type control-x to cancel the cat command.
- the time parameter is optional; it just tells you afterwards how long it took.
- this command typically takes between 5 and 12 minutes (USB3 is at least 2x faster than USB).
After you imaged the drive, you need to increase the partition and fix the GPT tables (the UEFI partition size issue mentioned above).
Remember you made you master’s partition as small as you could to cut down on the time it takes to create your image and the amount of room you need to store those images. So after the imaging above, your cloned partition is exactly the size of your master’s, which will only have 1 or 2 GB of storage space for the user of the machine (rather than the rest of the drive). So now we fix that:
- Continuing from the above, go to the Launcher menu and open gParted
- Enter your password to open the app
- The first thing you will see is an error (hopefully) that talks about the partition size, GPT table, etc. CLICK THE “FIX” BUTTON
- Then continue to use gParted to:
- select the cloned machine’s drive (menu top right)
- select the data partition (usually the second one)
- resize that data partition to use up the entire drive; make it as large as you can.
- apply changes and confirm.
- exit gParted
- Shut down your cloned machine, remove your USB Flash drive and test the machine.
Testing !!
- To be sure, use the above to clone to a testing machine before you start handing out machines. If you have to make changes to the Master, you start all over.
If you are doing more than a few machines…
Sometimes, especially when working with others or volunteers, the USB drive gets messed up. That can happen if the machine is shut down incorrectly or sometimes the target when imaging (the cat command) is set to itself, meaning you cloned the USB drive you are booted from instead of the laptop or desktop you are cloning.
Either way, if your USB drive is corrupted, you have to create a new one. And that is a lot of work. See above 🙂
Soooo this is where things get a little trippy but here is what we do at PCF: we repeat the entire process above that we did for the Master computer but then for the USB Flash drive. In other words, we treat our USB installer drive as a master, make an image of it and then clone it to other USB drives.
So every time we need to make an additional USB installer Flash drive, we simply clone the installer image onto a new USB drive.
The naming convention we use at PCF is PCF-v##.img for the master machine images. USB-v##.img for the matching USB installer drive image. So USB-v31 is the installer image that contains the image for master machine revision 31. Naturally, the image size of the USB will be quite a bit larger than the master as it contains the master machine’s image as well as the USB’s operating system and apps.
The process is virtually the same as above. All the commands are identical, it is just that the paths of what you are copying and to where will differ.
The only thing you need to do is figure out where you are going to write these files to. At PCF we have the following equipment dedicated to our imaging process:
- We have a Linux (“Tiny”) desktop with a decent size drive on it. That is our imaging computer that we use to store all the image files (for master machines and USB imaging sticks) and to make USB installer drives.
- We have a few XXL USB Flash drives that are big enough to hold a master computer image and a USB master image on it
- We have imaging Flash drives that are 64Gb minimum – 64Gb should be big enough to hold the bootable Linux OS, apps and the image of the Master computer you are cloning.
- We use Dev Flash drives that are 128Gb or even 356Gb. These are the sticks we use to create the images. We like to use these larger sticks as it saves a step of having to offload an image in order to save another.
- We have a testing desktop or laptop to test our images/cloning before we start doing them for recipients. You can just re-image that testing machine every time you have a new version of your master and need to test. Optionally, you can always use a machine you are going to give away later and just reimage it again later if necessary.
So after we create a new version of the master:
- We test it using our Dev Flash drive on a test machine to make sure it is what we wanted.
- We then copy the image (using Terminal) from the Dev Flash drive to our imaging master desktop (also in /install)
- We then copy that image (using Terminal) from the imaging desktop to our USB Installer Flash drive in /install (remove old images to make room if necessary
- We then boot from the imaging desktop and insert the installation USB.
- Use gParted to make the installation USB’s data partition as small as possible plus 1 or 2Gb
- We then make an image of that USB and save the of (output file) to our Imaging Desktop’s /install directory
- Use the cat command to image that image to fresh USB drives.
- For each one of those, run gParted to fix the GPT table and increase the partition to be as large as possible.
That is essentially the process we have used for the last few years. As of 7/’25, we are up to version 38 on our Master and USB Installers. Please feel free to contact us if you have questions or need help.